
Why Recessed Lighting Needs the Right Electrical Setup
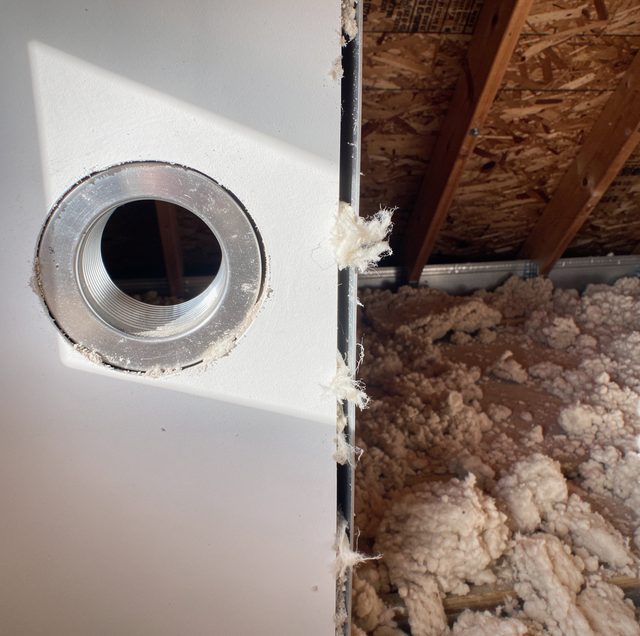
A recessed light isn't just a hole cut in the ceiling with a bulb dropped in. The housing above your drywall has to manage heat, maintain proper clearance around any nearby wood framing, and connect to a circuit sized for what's actually going into that can. Skip any one of those steps, and the fixture can nuisance-cycle on and off, overheat, or, in the worst case, sit above insulation as a hidden fire risk you never think to check.
Why the Housing Type Matters More Than the Trim Ring
Recessed housings fall into two broad categories: IC-rated and non-IC-rated. IC, for insulation contact, means the housing is built to safely touch attic or ceiling insulation directly, with an internal design that sheds heat even when insulation is packed right against it. A non-IC housing needs a clear air gap, typically several inches, around the entire can, because it has no way to dissipate heat if insulation is later pushed against it.
Most people shopping for recessed lighting pick a trim style or a bulb color temperature first without knowing which housing category is already in their ceiling. That's backwards. The housing decision is what actually determines whether nearby insulation is a fire risk at all, and it has to be settled before anything else about the fixture.
How Recessed Lights Protect Themselves
Nearly every recessed housing has a small thermal protector, sometimes called a snap disc, built in. If the housing gets too hot, the protector cuts power to the socket and then resets once things cool down, producing a slow blink-on, blink-off cycle. That cycle looks like a failing bulb or a wiring fault, but it's often the housing correctly protecting itself from an overheating condition, frequently an LED retrofit trim pulling more heat than the can was designed for, or insulation sitting too close to a non-IC housing.
Wiring and Circuit Sizing for a Bank of Cans
Each recessed light adds to the load on its circuit. A typical LED retrofit module that replaces a 65-watt incandescent bulb draws around 9 to 12 watts, so a dozen cans on their own usually sit well under what a standard circuit can carry. The math changes when a new run of recessed lighting gets added onto an existing lighting circuit that already feeds other rooms, since the combined draw, plus any inrush current from multiple LED drivers switching on at the same instant, can be enough to trip a breaker that was never sized with the new cans in mind. That inrush spike is brief, a fraction of a second, but a breaker that's already carrying other loads close to its rating doesn't need much more to tip it over.
Connections between cans, especially where a run splices to feed several fixtures from one point, also need to land at an accessible junction rather than be buried permanently behind drywall. That way, if a connection ever fails, it can be found and repaired instead of requiring drywall to be cut open somewhere in the dark.
Dimmers and Recessed LED Retrofits
The LED driver inside a retrofit trim isn't automatically compatible with an older dimmer built for incandescent bulbs. Pairing the wrong dimmer with an LED retrofit kit causes flicker, an audible buzz, or a minimum brightness that won't go any lower, and none of that is a wiring fault. It's a mismatch between the driver and the dimmer's switching type, and the fix is a dimmer specifically rated for LED loads, not a different bulb.
Where Improper Installation Becomes a Fire Risk
The most common sequence goes like this: a non-IC housing gets installed correctly, with proper clearance, and then years later an attic gets new blown-in insulation from a different contractor who has no reason to know which housings in the ceiling need that clearance maintained. The new insulation ends up pressed against a can that was never designed to handle it, trapping heat that can smolder for a long time before anyone notices anything wrong. A bulb pushed into a can rated for a lower wattage than the installed one creates a similar overheating risk at the socket, regardless of insulation.
Recessed Lighting in Bathrooms, Showers, and Outdoor Soffits
A can installed above a shower stall or in an outdoor soffit has to deal with moisture, not just heat, and that changes the housing requirement again. A shower-rated (wet-location) trim uses a sealed lens and gasket so condensation and direct spray can't reach the socket or driver behind it, while a standard interior trim left in that spot will eventually let moisture in around the edges, corroding the socket contacts and shortening the bulb or driver's life well before any obvious failure shows up. Outdoor soffit cans face the same issue from rain and blown moisture rather than shower steam, and the fix is the same: a housing and trim actually rated for wet locations, not just a standard interior can tucked under an overhang and assumed to be protected.
Frequently Asked Questions
Usually there's a label stamped inside the housing itself, visible once the trim and bulb are removed, listing the IC rating, maximum wattage, and whether direct insulation contact is allowed. A can with no visible label at all is often an older, unrated housing worth having inspected.
An LED driver has to chop the electrical waveform to produce dimming, and a driver that's mismatched to the dimmer's minimum load or switching type produces an audible buzz right around the low end of the dial, where that waveform is choppiest. It's a separate issue from the slow on-off cycling caused by a thermal protector.
There's no single number, since it depends on each fixture's actual wattage draw and whatever else already shares that circuit. A run of a dozen or more LED retrofit cans added to a circuit that also feeds several other rooms is a common point where an electrician recommends splitting the new lighting onto its own circuit.
Not always replaced, but every non-IC housing in the area getting new insulation needs its clearance re-verified before the work happens, not after. A baffle or dam, a rigid barrier installed around the housing that holds loose-fill insulation back at a set distance, lets the rest of the attic keep its full R-value without burying that one can. If a baffle isn't already there from the original install, this is normally the point where one gets added, since retrofitting it after insulation is already blown in means pulling insulation back out of that spot first to do it. IC-rated housings skip all of this since they're built to have insulation touching them directly, which is one more reason to know which category is already in the ceiling before an insulation crew shows up and starts blowing cellulose over everything.
Yes. If the housing's ventilation slots get blocked by insulation, debris, or a sealed retrofit trim installed backwards, the internal thermal protector can still cycle even with a properly rated bulb, since the problem is airflow around the housing itself, not the bulb's wattage.
It can be, but a ceiling fan's motor draw, combined with several new recessed cans on the same run, is worth having calculated against that circuit's breaker rating before installation, rather than assuming it's fine just because the fan alone never gave any trouble.
A recessed light installed right disappears the way it's supposed to: no cycling on and off, no buzz at the dimmer, nothing drifting down from the ceiling months later. Get the housing type, the clearance, and the circuit sizing settled before the drywall goes back up, because none of those three are things you can fix from underneath once the room looks finished.
Adding recessed lighting or troubleshooting a can that keeps blinking off — get the housing and circuit checked before you finish the room. Zimmerman Electric Company serves Surprise, Sun City, and Peoria. Call (602) 497-3365.
